DIY Fashion Hacks: Transform Your Closet, Save 75% on New Clothes This Quarter
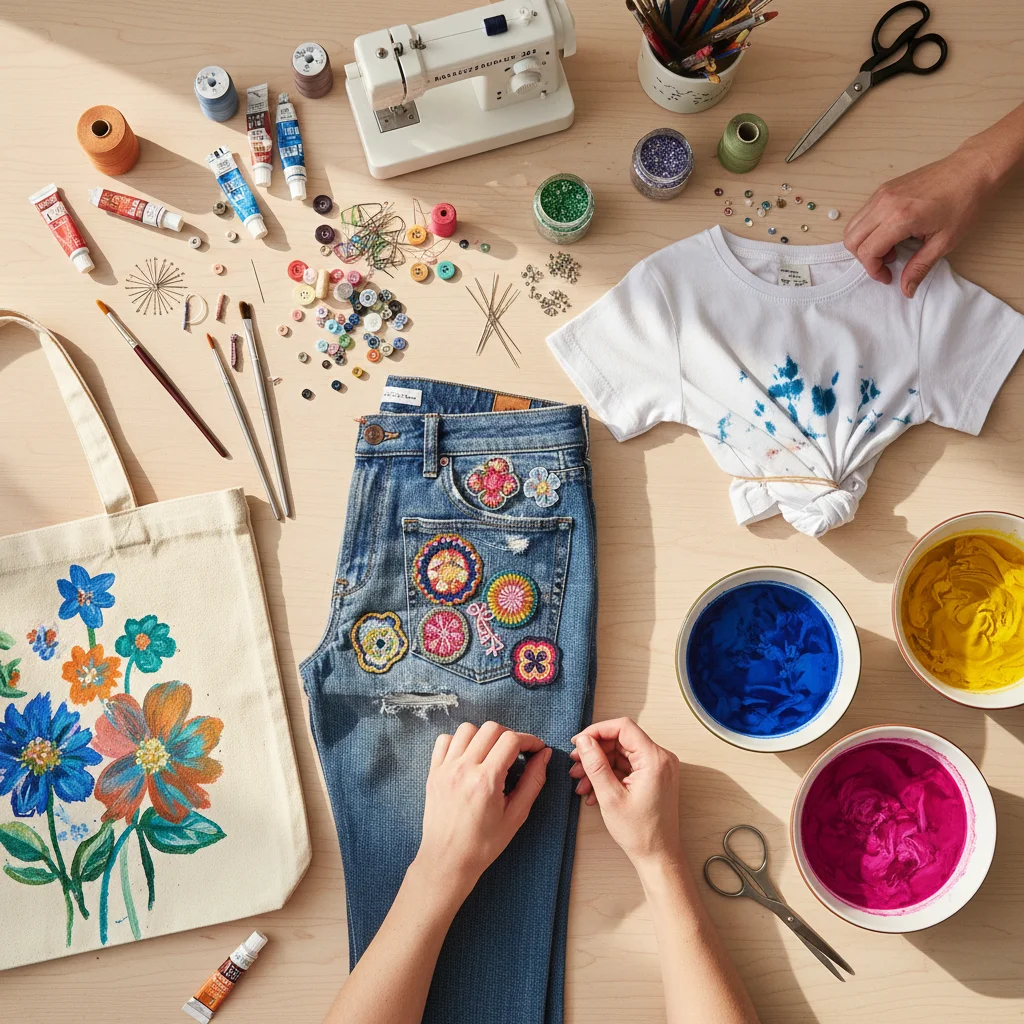
DIY Fashion Hacks: Transform Your Closet, Save 75% on New Clothes This Quarter
Are you tired of staring at a closet full of clothes and feeling like you have nothing to wear? Do you dream of a fresh wardrobe but dread the thought of spending a fortune on new items? What if we told you that you could completely revamp your style, express your unique personality, and save up to 75% on your clothing budget this quarter, all from the comfort of your home? Welcome to the wonderful world of DIY Fashion Hacks!
In an era dominated by fast fashion, where trends come and go in the blink of an eye, and environmental concerns are at an all-time high, embracing DIY fashion is more relevant than ever. It’s not just about saving money; it’s about sustainability, creativity, and making a statement that is authentically YOU. This comprehensive guide will equip you with the knowledge and inspiration to tackle three simple yet impactful DIY fashion projects that will breathe new life into your existing garments, turning forgotten pieces into cherished new favorites.
We’ll delve into easy-to-follow steps for distressing and embellishing denim, mastering the art of tie-dye, and creating bespoke accessories from old textiles. Each project is designed to be beginner-friendly, requiring minimal tools and maximum enthusiasm. By the end of this article, you’ll not only have a refreshed wardrobe but also a newfound appreciation for the power of your own two hands and a significant chunk of change still in your wallet. Get ready to unleash your inner fashion designer and transform your closet, one brilliant DIY fashion hack at a time!
The Power of DIY Fashion Hacks: Why Upcycle Your Wardrobe?
Before we dive into the exciting projects, let’s understand why DIY Fashion Hacks are not just a trend but a powerful movement. The fashion industry is one of the most polluting in the world, with massive amounts of textile waste ending up in landfills annually. By choosing to upcycle, repurpose, and customize your existing clothes, you are actively contributing to a more sustainable planet. You’re reducing demand for new manufacturing, conserving resources, and minimizing your carbon footprint. It’s fashion with a conscience!
Beyond environmental benefits, the financial savings are undeniable. Imagine buying a brand-new, on-trend distressed pair of jeans for $80-$100 or more. Now, imagine achieving a similar, if not better, look using an old pair of jeans you already own, spending only a few dollars on patches or sandpaper. The math speaks for itself. Over a quarter, these small savings on individual items can add up to hundreds, even thousands, of dollars. This allows you to allocate your budget to other important areas of your life or even invest in a few high-quality, ethically produced staple pieces.
But perhaps the most rewarding aspect of DIY Fashion Hacks is the personal expression it allows. In a world where mass-produced clothing often leads to everyone looking similar, DIY fashion empowers you to stand out. You become the creator of your own style, infusing each piece with your personality, stories, and artistic flair. Your clothes become conversation starters, unique reflections of who you are, rather than just another item off the rack. This creative outlet can be incredibly therapeutic and confidence-boosting, making your wardrobe truly one-of-a-kind. It’s about owning your style and making it uniquely yours, without breaking the bank.
Project 1: Denim Distress & Embellish – From Drab to Fab
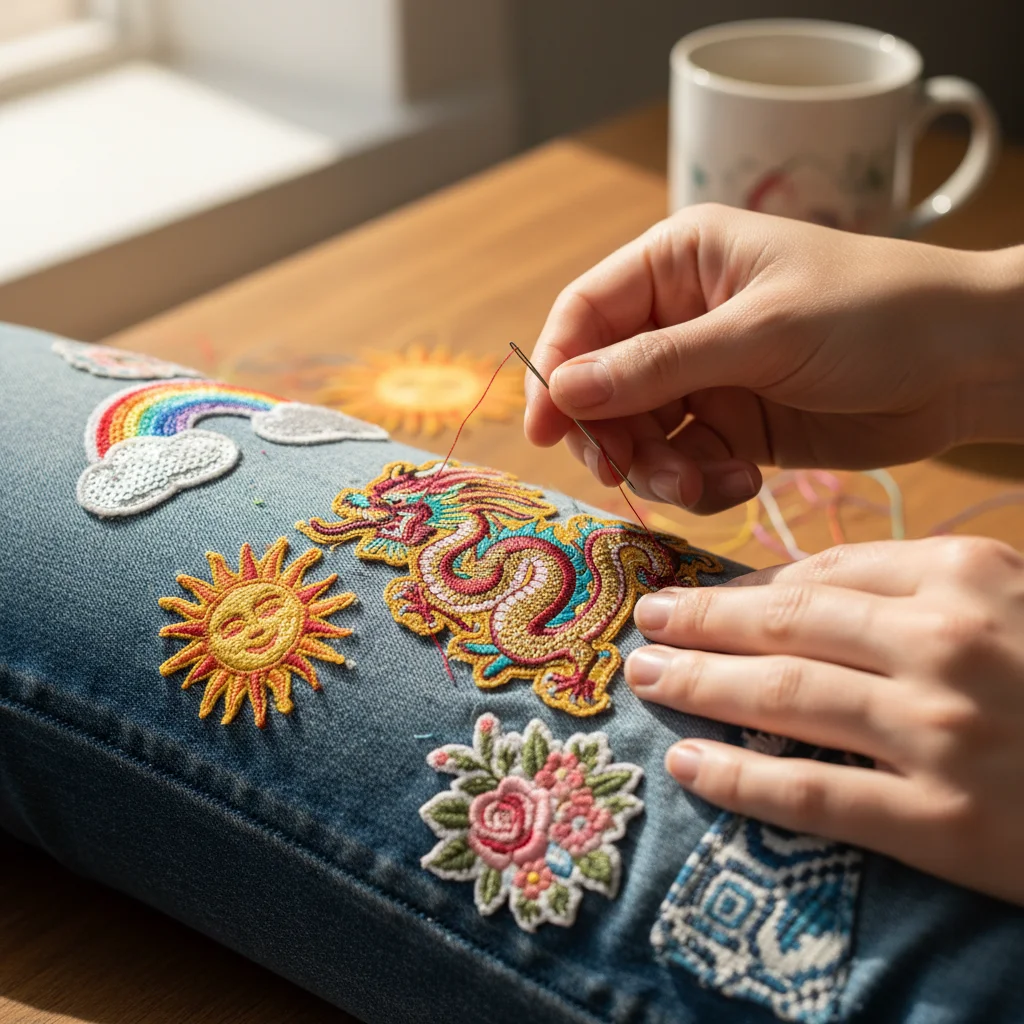
Denim is a wardrobe staple, but even the most beloved jeans or jackets can start to feel a bit… mundane. This DIY fashion hack is perfect for transforming tired denim into a statement piece. We’ll cover two main techniques: distressing for that effortlessly cool, lived-in look, and embellishing with patches or embroidery for a personalized touch.
What You’ll Need:
- An old pair of denim jeans, a jacket, or a skirt
- Sandpaper (medium to coarse grit)
- Scissors or a craft knife
- Tweezers
- Fabric chalk or a washable marker
- Optional: Decorative iron-on patches, fabric glue, needle and thread (for sewing patches), embroidery floss, embroidery needle, thimble.
- A cutting mat or a piece of cardboard to protect your work surface.
Step-by-Step Guide to Distressing Denim:
- Identify Your Distress Zones: Put on your denim and mark the areas where you want to add distressing. Common spots include knees, thighs, pockets, and hems. Consider where natural wear would occur.
- Prepare Your Work Area: Lay your denim flat on a protected surface. Insert a piece of cardboard or a cutting mat inside the leg or sleeve to prevent cutting through to the other side.
- Rough It Up with Sandpaper: Use sandpaper to rub back and forth vigorously over the marked areas. This starts to thin the fabric and create a faded, worn look. The more you rub, the more frayed it will become.
- Cut and Fray (Carefully!): For holes or significant fraying, use your scissors or craft knife to make small horizontal cuts within the sanded areas. Start small, as you can always make them bigger.
- Pull Threads with Tweezers: Once you’ve made your cuts, use tweezers to pull out the horizontal (white) threads, leaving the vertical (blue) threads intact. This creates that classic ripped denim look. Be patient, it takes time!
- Wash and Dry: After distressing, wash and dry your denim. This will further enhance the frayed edges and soften the distressed areas.
Step-by-Step Guide to Embellishing Denim:
Once your denim is distressed (or even if you prefer it plain), adding embellishments is the perfect way to inject personality.
- Choose Your Embellishments: Decide on iron-on patches, embroidered designs, or a mix of both. Collect your chosen patches or embroidery floss.
- Plan Your Placement: Lay out your denim and arrange the patches or sketch your embroidery design with fabric chalk. Experiment with different layouts until you find one you love.
- Attach Iron-On Patches: Follow the instructions on your iron-on patches. Typically, you’ll place the patch, cover it with a thin cloth, and press a hot iron firmly over it for 30-60 seconds. Repeat on the inside if necessary. For extra durability, especially for items that will be washed frequently, consider stitching the edges of iron-on patches.
- Embroider Your Design: If you’re opting for embroidery, thread your needle with embroidery floss. Use simple stitches like running stitch, backstitch, or French knots to create your design. There are countless online tutorials for basic embroidery stitches if you’re new to it.
- Secure and Finish: Once all embellishments are in place, ensure they are securely attached. Trim any loose threads.
Voila! You now have a unique, custom-designed denim piece that reflects your personal style, all thanks to these simple DIY Fashion Hacks. This project alone can save you a significant amount compared to buying designer distressed and embellished denim.
Project 2: Tie-Dye Revival – A Burst of Color for Old Tees
Tie-dye isn’t just for summer camps anymore! This vibrant and fun DIY Fashion Hack is a fantastic way to revitalize old t-shirts, sweatshirts, socks, or even bedsheets that have lost their luster. It’s incredibly forgiving, meaning every outcome is unique and beautiful, even for beginners.
What You’ll Need:
- Plain white or light-colored cotton garments (pre-washed)
- Tie-dye kit (includes dyes, rubber bands, gloves, and soda ash) OR individual fabric dyes, soda ash, and squeeze bottles
- Plastic squeeze bottles (if not in a kit)
- Rubber bands or string
- Plastic wrap or plastic bags
- Bucket or large basin
- Old towels or newspaper to protect your workspace
- Gloves (essential!)
Step-by-Step Guide to Tie-Dyeing:
- Prepare Your Workspace: Lay down old towels or newspaper to cover your entire work area. This can get messy! Wear old clothes.
- Pre-Soak with Soda Ash: Most tie-dye kits include soda ash (sodium carbonate), which helps the dyes adhere to the fabric. Dissolve the soda ash in warm water according to package directions and soak your garments for 15-20 minutes. Wring them out thoroughly so they are damp but not dripping.
- Choose Your Tie-Dye Pattern: This is where the magic happens! Here are a few popular patterns:
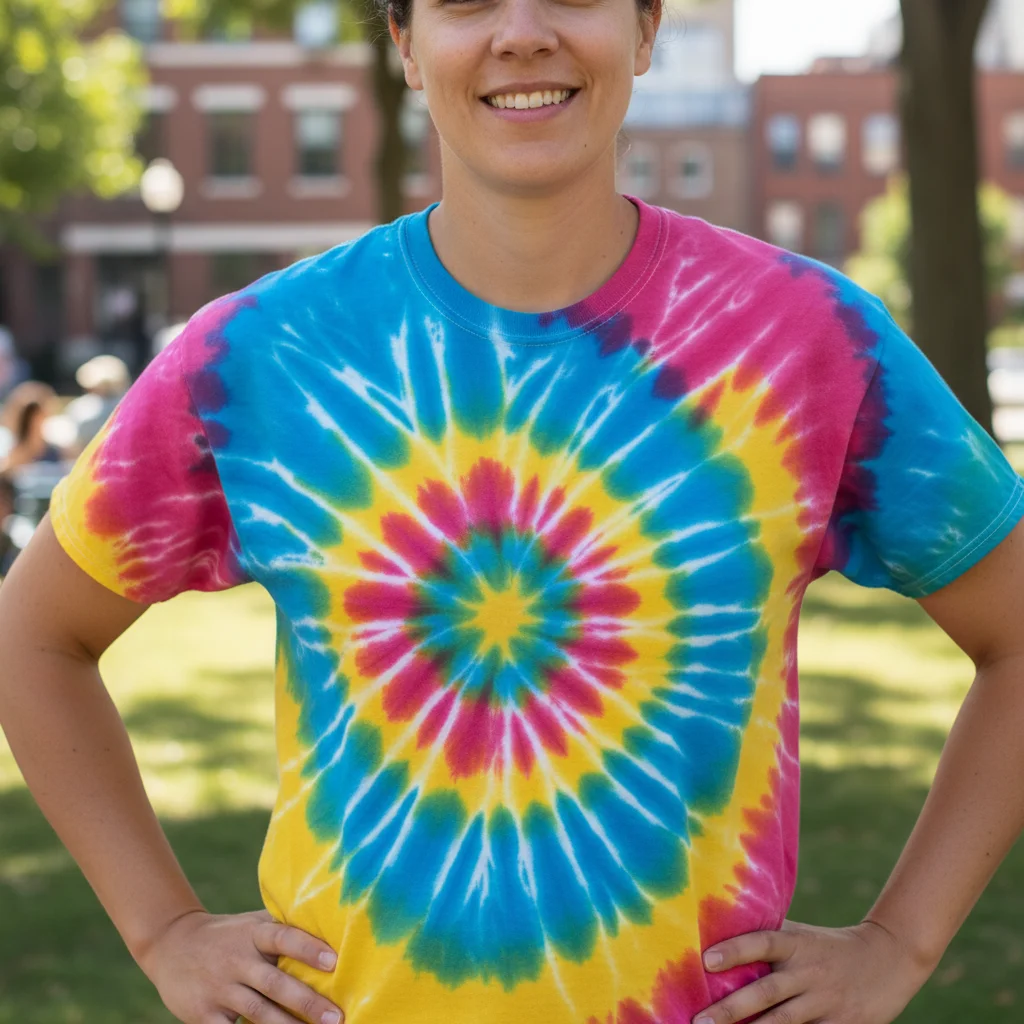
- Spiral: Lay the damp shirt flat. Pinch the fabric in the center of where you want your spiral to begin and twist it clockwise until the entire shirt is coiled into a flat disc. Secure with 3-4 rubber bands forming a pie-like shape.
- Crumple: Simply crumple the damp fabric into a loose ball. Secure with several rubber bands crisscrossing in various directions.
- Stripes: Fold the damp shirt accordion-style, either horizontally or vertically. Secure with rubber bands at regular intervals along the folded length.
There are many other patterns – a quick online search for “tie-dye patterns” will yield endless inspiration!
- Apply the Dyes: Put on your gloves! Prepare your dyes according to kit instructions. Using squeeze bottles, apply the different colors to various sections of your rubber-banded garment. For spirals, fill each ‘pie slice’ with a different color. For crumple, randomly squirt colors over the entire ball. Be generous but try not to over-saturate to prevent muddying the colors too much. Flip the garment over and apply dye to the other side.
- Cure the Dye: Once dyed, carefully place your garment into a plastic bag or wrap it tightly in plastic wrap. Let it sit for at least 6-8 hours, or preferably 24 hours, to allow the dye to fully set. The longer it sits, the more vibrant the colors will be.
- Rinse and Wash: With gloves still on, remove the garment from the plastic and rinse it under cold running water in a sink or utility tub. Continue rinsing until the water runs mostly clear. Remove the rubber bands. Wash the garment separately in cold water with a small amount of detergent for the first few washes to prevent dye bleeding onto other clothes.
And just like that, you’ve transformed a plain item into a wearable piece of art! Tie-dye is an incredibly satisfying DIY Fashion Hack that yields unique results every time, ensuring your revitalized pieces are truly one-of-a-kind. Think of the money you’ve saved on buying new graphic tees!
Project 3: Upcycled Fabric Accessories – Sustainable Style Statements
Don’t throw away those old scarves, worn-out t-shirts, or even scraps of fabric from other projects! This DIY Fashion Hack focuses on turning textile waste into chic and sustainable style accessories. We’ll explore creating fabric headbands and simple no-sew tote bags, proving that creativity knows no bounds when it comes to upcycling.
Sub-Project 3.1: No-Sew Fabric Headbands from Old T-Shirts
Give your hair a stylish upgrade with a custom headband made from a soft, old t-shirt. This project is incredibly quick and requires no sewing!
What You’ll Need:
- An old t-shirt (preferably cotton or a stretchy knit)
- Scissors
- Ruler or measuring tape
Step-by-Step Guide:
- Prepare Your Fabric: Lay your t-shirt flat. Locate the bottom hem.
- Cut Strips: Starting from the bottom hem, cut off 1-inch wide strips of fabric, perpendicular to the hem. Don’t worry if they’re not perfectly straight; a little imperfection adds character. You’ll need about 3-5 strips, depending on the thickness you desire for your headband.
- Stretch the Strips: Gently pull each fabric strip. The edges will curl inward, creating a soft, tubular ‘yarn’ effect. This also helps to remove any raw edges.
- Braid or Twist: Gather three or more stretched strips. Tie them together at one end in a knot. Begin braiding or twisting the strips tightly. For a simple twist, take two strips and twist them around each other. For a braid, use three.
- Secure and Finish: Once your braid or twist is long enough to fit comfortably around your head, tie off the loose ends in a knot. You can either sew the ends together to form a seamless loop (if you have a needle and thread handy) or tie them in a bow or knot to wear at the nape of your neck or on the side.
You now have a unique, comfortable, and eco-friendly headband that cost you nothing! This is an excellent example of how DIY Fashion Hacks can turn trash into treasure.
Sub-Project 3.2: No-Sew Upcycled Tote Bag from a T-Shirt
Say goodbye to plastic bags and hello to your very own custom tote! This no-sew project is perfect for carrying groceries, books, or beach essentials.
What You’ll Need:
- An old t-shirt (the bigger, the better for a spacious tote)
- Sharp scissors
- Fabric chalk or a marker
- Ruler or straight edge
Step-by-Step Guide:
- Lay Flat and Smooth: Lay your t-shirt flat and smooth it out.
- Cut Off the Sleeves: Cut off both sleeves along the seam line. This will form the top opening of your bag.
- Cut Out the Neckline: Cut a wide U-shape around the neckline. This will create the handles of your tote bag. Adjust the depth and width to create comfortable handle sizes.
- Prepare the Bottom (Fringe): Turn the shirt inside out. Using your ruler and fabric chalk, draw a straight line about 1-2 inches from the bottom hem of the shirt. This will be the base of your fringe.
- Cut the Fringe: From the bottom raw edge of the shirt, cut vertical strips up to the line you just drew. Make these strips about 1 inch wide. You’ll have two layers of fringe.
- Tie the Fringe: Take one strip from the front layer and one corresponding strip from the back layer. Tie them together in a double knot. Work your way across the entire bottom, tying all the fringe strips together. Ensure the knots are tight to prevent items from falling out.
- Reinforce (Optional): For extra security, you can tie a second knot with adjacent pairs of tied fringes, creating a stronger, interlocked bottom.
- Turn Right Side Out: Once all fringes are tied, turn your new tote bag right side out.
And there you have it – a functional, fashionable, and completely unique tote bag, all made from a discarded t-shirt! These two accessory DIY Fashion Hacks highlight the incredible potential of giving old textiles a new purpose.
Maximizing Your Savings: The 75% Rule with DIY Fashion Hacks
Now that you’ve learned these incredible DIY Fashion Hacks, let’s talk about how they translate into significant savings. The 75% rule isn’t an arbitrary number; it’s a realistic goal when you prioritize upcycling and mindful consumption. Consider the average cost of buying new items versus the cost of materials for DIY:
- Distressed & Embellished Jeans/Jacket: A new designer piece can cost $80-$200. Your DIY version uses an existing item (cost: $0, or a thrift store find for $5-$10) plus patches/sandpaper ($5-$20). Potential savings: 75-95%.
- Tie-Dye T-Shirt: A trendy tie-dye shirt can retail for $25-$50. Your DIY version uses an old t-shirt (cost: $0) and a tie-dye kit ($15-$30, which can dye multiple items). Potential savings: 50-100% per item.
- Fabric Headbands: Store-bought headbands range from $5-$20. Your DIY version uses an old t-shirt (cost: $0). Potential savings: 100%.
- Upcycled Tote Bag: A new tote bag can cost $10-$30. Your DIY version uses an old t-shirt (cost: $0). Potential savings: 100%.
By consciously choosing to implement these DIY Fashion Hacks for just a few items each quarter, you can dramatically reduce your expenditure on clothing. Imagine taking those savings and putting them towards a travel fund, a down payment, or simply enjoying more experiences. This isn’t just about fashion; it’s about financial empowerment and smart living.
Beyond the Projects: Cultivating a DIY Fashion Mindset
These three projects are just the tip of the iceberg when it comes to DIY Fashion Hacks. Once you start, you’ll begin to see every garment as a canvas for creativity. Here are some fashion tips for cultivating a long-term DIY fashion mindset:
- Thrift Store Treasure Hunts: View thrift stores not just as places to buy clothes, but as sources of raw materials for your next project. A $5 oversized blazer can become a chic cropped jacket with a few snips and a new hem.
- Learn Basic Sewing Skills: Even knowing how to sew a straight line on a machine or hand-stitch a hem can open up a world of possibilities for alterations and transformations.
- Embrace Imperfection: DIY fashion is about individuality, not factory perfection. Don’t be afraid of a slightly uneven stitch or a unique dye pattern. These are the marks of your creativity.
- Share and Inspire: Show off your creations! Share your DIY Fashion Hacks with friends and family. You might inspire others to join the sustainable fashion movement.
- Stay Inspired: Follow DIY fashion blogs, Pinterest boards, and YouTube channels. There’s a vast community of creators sharing innovative ideas and tutorials.
- Invest in Good Tools: A sharp pair of fabric scissors, a sewing kit, and a reliable iron are worthwhile investments that will make your DIY journey much smoother.
Embracing DIY Fashion Hacks is a journey, not a destination. It’s about continually learning, experimenting, and finding joy in the process of creating something new from something old. It’s about making conscious choices that benefit your wallet, the planet, and your personal style.
Conclusion: Your Wardrobe, Reimagined by DIY Fashion Hacks
You’ve now been armed with three powerful DIY Fashion Hacks: transforming denim, revitalizing textiles with tie-dye, and crafting unique accessories. These projects are more than just crafts; they are gateways to a more sustainable, creative, and economically savvy approach to fashion. By dedicating a little time and effort, you can achieve significant savings, reduce your environmental impact, and build a wardrobe that truly reflects your personality.
Imagine looking into your closet this quarter and seeing not just clothes, but stories, creativity, and conscious choices. The satisfaction of wearing something you’ve transformed yourself is unparalleled. So, gather your old garments, unleash your creativity, and start experimenting. Your journey into the exciting world of DIY Fashion Hacks begins now. Get ready to save money, express yourself, and make a positive impact, all while looking fabulous!
What’s your favorite piece you’ve ever transformed? Share your own DIY Fashion Hacks and success stories in the comments below!